1. 引言
Spring Security进行认证和鉴权的时候,就是利用一系列的Filter来进行拦截的。如下图所示,一个请求想要访问到API就会从左到右经过蓝线框里的过滤器,其中黄色部分是负责认证的过滤器,蓝色部分负责异常处理,橙色部分则是负责授权。经过一些列拦截最终访问到我们的API。
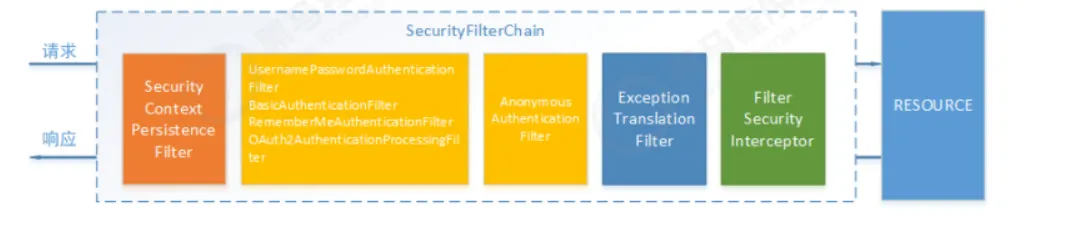
这里需要重点关注两个过滤器:UsernamePasswordAuthenticationFilter负责登录认证,FilterSecurityInterceptor负责权限授权。
在SpringSecurity中,会使用默认的FilterSecurityInterceptor来进行权限校验,在FilterSecurityInterceptor中会从SecurityContextHolder获取其中的Authentication,然后获取其中的权限信息,判断当前用户是否拥有访问当前资源所需的权限。
SpringSecurity中的Authentication类
1
2
3
4
5
6
7
8
9
10
11
12
13
14
| public interface Authentication extends Principal, Serializable {
Collection<? extends GrantedAuthority> getAuthorities();
Object getCredentials();
Object getDetails();
Object getPrincipal();
boolean isAuthenticated();
void setAuthenticated(boolean var1) throws IllegalArgumentException;
}
|
Principal: 用户信息,没有认证时一般是用户名,认证后一般是用户对象
Credentials: 用户凭证,一般是密码
Authorities: 用户权限
2. 代码示例
将权限信息,赋值给UserDetails
在我们之前自定义的UserContextDetails中,已经有对应的权限信息了,因此,我们可以将其权限信息,转化为对应的Authority类,我们修改MyUserDetails类,将UserContextDetails中和权限相关的类,转化为SpringSecurity体系中的权限类。
1
2
3
4
5
6
7
8
9
10
11
12
13
14
15
16
17
18
19
20
21
22
23
24
25
26
27
28
29
30
31
32
33
34
35
36
37
38
39
40
41
42
43
44
45
46
47
48
49
50
51
52
53
54
55
56
57
58
59
60
61
62
63
64
65
66
67
68
69
70
71
72
73
74
75
76
77
78
79
| package com.yang.infrastructure.security;
import com.alibaba.fastjson.JSONObject;
import com.yang.infrastructure.auth.PermissionDetails;
import com.yang.infrastructure.auth.UserContextDetails;
import lombok.Data;
import org.springframework.security.core.GrantedAuthority;
import org.springframework.security.core.authority.AuthorityUtils;
import org.springframework.security.core.userdetails.UserDetails;
import org.springframework.util.CollectionUtils;
import java.util.ArrayList;
import java.util.Collection;
import java.util.List;
import java.util.stream.Collectors;
@Data
public class MyUserDetails implements UserDetails {
private UserContextDetails userContextDetails;
private String password;
private List<GrantedAuthority> authorityList = new ArrayList<>();
public MyUserDetails(UserContextDetails userContextDetails) {
this.userContextDetails = userContextDetails;
richAuthority();
}
private void richAuthority() {
List<PermissionDetails> permissionDetails = userContextDetails.getPermissionDetails();
if (CollectionUtils.isEmpty(permissionDetails)) {
return;
}
String[] permissions = permissionDetails.stream().map(PermissionDetails::getName)
.collect(Collectors.toList()).toArray(new String[0]);
this.authorityList = AuthorityUtils.createAuthorityList(permissions);
}
public MyUserDetails(UserContextDetails userContextDetails, String password) {
this.userContextDetails = userContextDetails;
this.password = password;
}
@Override
public Collection<? extends GrantedAuthority> getAuthorities() {
return this.authorityList;
}
@Override
public String getPassword() {
return this.password;
}
@Override
public String getUsername() {
return userContextDetails.getUsername();
}
@Override
public boolean isAccountNonExpired() {
return true;
}
@Override
public boolean isAccountNonLocked() {
return true;
}
@Override
public boolean isCredentialsNonExpired() {
return true;
}
@Override
public boolean isEnabled() {
return true;
}
}
|
然后还需要修改JwtTokenVerifyFilter类,在构建UsernamePasswordAuthenticationToken的时候,将权限赋值上去。
1
2
3
4
5
6
7
8
9
10
11
12
13
14
15
16
17
18
19
20
21
22
23
24
25
26
27
28
29
30
31
32
33
34
35
36
37
38
39
40
41
42
43
44
45
46
47
48
49
50
51
52
53
54
55
56
57
58
59
60
61
62
63
64
65
66
67
68
69
70
71
72
73
74
75
76
77
78
79
80
81
82
83
84
| package com.yang.infrastructure.security.filter;
import com.alibaba.fastjson.JSONObject;
import com.yang.domain.data.Role;
import com.yang.infrastructure.auth.PermissionDetails;
import com.yang.infrastructure.auth.UserContextDetails;
import com.yang.infrastructure.auth.config.JwtTokenProperty;
import com.yang.infrastructure.auth.request.JwtTokenVerifyRequest;
import com.yang.infrastructure.auth.response.JwtTokenVerifyDTO;
import com.yang.infrastructure.auth.service.JwtTokenService;
import com.yang.infrastructure.security.MyUserDetails;
import com.yang.infrastructure.utils.RedisUtils;
import com.yang.infrastructure.utils.SpringContextUtils;
import org.apache.commons.lang3.StringUtils;
import org.springframework.security.authentication.UsernamePasswordAuthenticationToken;
import org.springframework.security.core.context.SecurityContextHolder;
import org.springframework.security.core.userdetails.UserDetails;
import org.springframework.web.filter.OncePerRequestFilter;
import javax.servlet.FilterChain;
import javax.servlet.ServletException;
import javax.servlet.http.HttpServletRequest;
import javax.servlet.http.HttpServletResponse;
import java.io.IOException;
import java.util.List;
import java.util.stream.Collectors;
public class JwtTokenVerifyFilter extends OncePerRequestFilter {
@Override
protected void doFilterInternal(HttpServletRequest request, HttpServletResponse response, FilterChain filterChain) throws ServletException, IOException {
String token = request.getHeader("token");
if (StringUtils.isEmpty(token)) {
filterChain.doFilter(request, response);
return;
}
UserContextDetails userContextDetails = null;
Object userDetailsFromRedis = getUserDetailsFromRedis(token);
if (userDetailsFromRedis != null) {
userContextDetails = (UserContextDetails) userDetailsFromRedis;
}
if (userContextDetails == null) {
JwtTokenService jwtTokenService = SpringContextUtils.getBeanOfType(JwtTokenService.class);
JwtTokenProperty jwtTokenProperty = SpringContextUtils.getBeanOfType(JwtTokenProperty.class);
JwtTokenVerifyRequest jwtTokenVerifyRequest = new JwtTokenVerifyRequest();
jwtTokenVerifyRequest.setToken(token);
jwtTokenVerifyRequest.setSecret(jwtTokenProperty.getSecret());
JwtTokenVerifyDTO verify = jwtTokenService.verify(jwtTokenVerifyRequest);
if (verify == null) {
filterChain.doFilter(request, response);
return;
}
userContextDetails = new UserContextDetails();
userContextDetails.setId(Integer.valueOf(verify.getSubject()));
userContextDetails.setToken(token);
userContextDetails.setUsername(verify.getPayLoads().get("username"));
userContextDetails.setExtendMap(verify.getPayLoads());
List<Role> roles = JSONObject.parseArray(verify.getPayLoads().get("roles"), Role.class);
userContextDetails.setPermissionDetails(roles.stream().map(role -> {
PermissionDetails permissionDetails = new PermissionDetails();
permissionDetails.setName(role.getCode());
return permissionDetails;
}).collect(Collectors.toList()));
}
if (userContextDetails == null) {
filterChain.doFilter(request, response);
return;
}
UserDetails userDetails = new MyUserDetails(userContextDetails);
UsernamePasswordAuthenticationToken authenticationToken = new UsernamePasswordAuthenticationToken(userDetails, null, userDetails.getAuthorities());
SecurityContextHolder.getContext().setAuthentication(authenticationToken);
filterChain.doFilter(request, response);
}
private Object getUserDetailsFromRedis(String token) {
RedisUtils redisUtils = SpringContextUtils.getBeanOfType(RedisUtils.class);
return redisUtils.getKey("token:" + token);
}
}
|
2.2. URL层面的授权
在配置类中,http.authorizeRequests()主要是对url进行控制,配置顺序会影响之后授权的效果,越是具体的应该放前面,越是笼统的应该放后面。
anyRequest(): 表示匹配所有的请求,一般情况下此方法都会使用,设置全部内容都需要进行认证,会放到最后。
antMatchers:参数是不定向参数,每个参数是一个ant表达式,用于匹配URL规则。
1
2
3
4
| ANT 通配符说明
? 匹配任何单字符
* 匹配0或者任意数量的字符
** 匹配0或者更多的目录
|
假设我们对/security/permitAll可以免认证,配置为:
1
2
| http.authorizeRequests
.antMatchers("/security/permitAll").permitAll()
|
在上述配置中,我们在antMatchers(“/security/permitAll”)后调用了permitAll()表示不需要认证,随意访问,在SpringSecurity中提供了多种内置控制。
2.2.1. 直接授权
| 方法 |
说明 |
| permitAll() |
所匹配的 URL ,任何人都允许访问 |
| denyAll() |
所匹配的 URL, 任何人都不允许被访问 |
| authenticated() |
所匹配的 URL ,任何人 都需要被认证才能访问 |
| anonymous() |
表示可以匿名访问匹配的 URL。和 permitAll()效果类似,只是设置为 anonymous()的 url 会执行 filter 链中 |
| rememberMe() |
被“remember me”的用户允许访问 |
| fullyAuthenticated() |
如果用户不是被 remember me ,才可以访问。 |
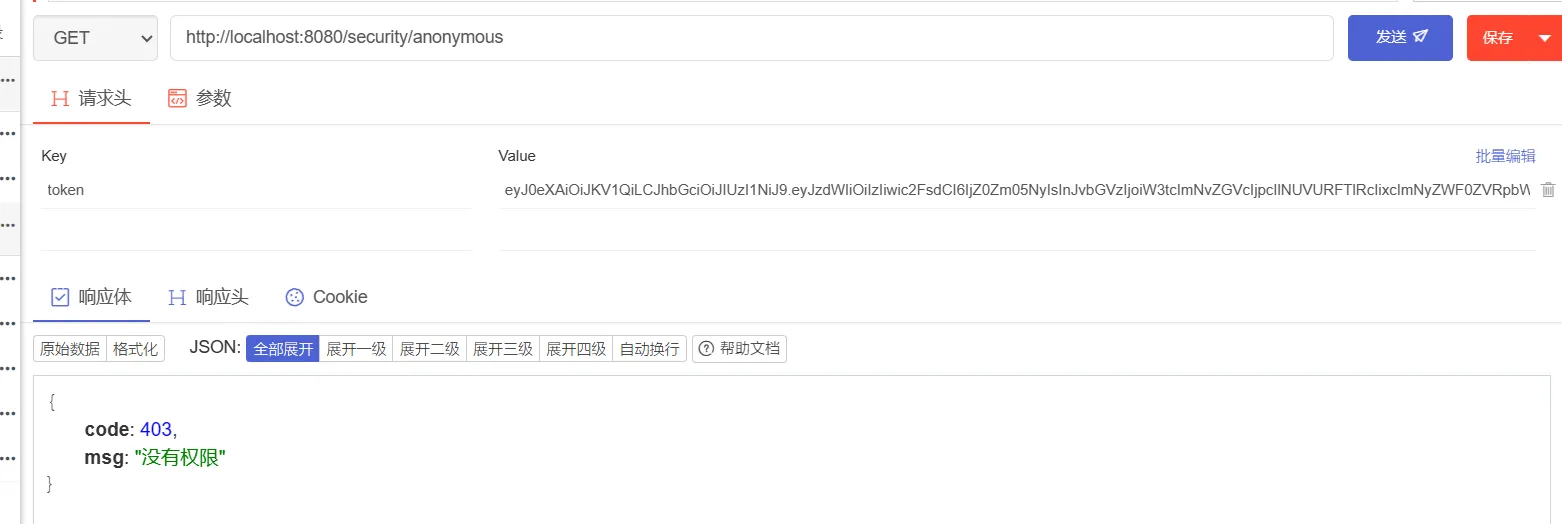
anonymouse和permitAll的区别:前者表示匿名访问,仅允许匿名用户访问,如果登录认证后,带有token信息再去请求,这个anonymouse关联的资源就不能访问;permitAll登录能访问,不登陆也能返回,一般用于静态资源js等。
假设我们的SpringSecurity配置如下:
1
2
3
4
5
6
7
8
9
10
11
12
13
14
15
16
17
18
19
20
21
22
23
24
25
26
27
28
29
30
31
32
33
34
35
36
37
38
39
40
41
| package com.yang.infrastructure.security.config;
import com.yang.infrastructure.security.filter.JwtTokenVerifyFilter;
import com.yang.infrastructure.security.handler.JwtAccessDeniedExceptionHandler;
import com.yang.infrastructure.security.handler.JwtAuthenticationExceptionHandler;
import org.springframework.context.annotation.Bean;
import org.springframework.context.annotation.Configuration;
import org.springframework.security.config.annotation.web.builders.HttpSecurity;
import org.springframework.security.config.annotation.web.configuration.EnableWebSecurity;
import org.springframework.security.config.http.SessionCreationPolicy;
import org.springframework.security.web.SecurityFilterChain;
import org.springframework.security.web.authentication.UsernamePasswordAuthenticationFilter;
@Configuration
@EnableWebSecurity
public class SecurityConfig {
@Bean
SecurityFilterChain filterChain(HttpSecurity httpSecurity) throws Exception {
httpSecurity.headers().cacheControl();
return httpSecurity.authorizeRequests()
.antMatchers("/user/login").permitAll()
.antMatchers("/user/register").permitAll()
.antMatchers("/security/permitAll").permitAll()
.antMatchers("/security/anonymous").anonymous()
.anyRequest().authenticated()
.and()
.csrf().disable()
.sessionManagement().sessionCreationPolicy(SessionCreationPolicy.STATELESS)
.and()
.cors().disable()
.exceptionHandling()
.authenticationEntryPoint(new JwtAuthenticationExceptionHandler())
.accessDeniedHandler(new JwtAccessDeniedExceptionHandler())
.and()
.addFilterBefore(new JwtTokenVerifyFilter(), UsernamePasswordAuthenticationFilter.class)
.build();
}
}
|
这里对登录、注册、permitAll接口放行,对anonymouse接口允许匿名访问。然后我们添加对应的controller
1
2
3
4
5
6
7
8
9
10
11
12
13
14
15
16
17
18
19
20
21
22
23
24
25
26
27
28
29
30
31
| package com.yang.controller;
import com.yang.infrastructure.common.Response;
import org.springframework.security.core.context.SecurityContextHolder;
import org.springframework.security.core.userdetails.UserDetails;
import org.springframework.web.bind.annotation.GetMapping;
import org.springframework.web.bind.annotation.RequestMapping;
import org.springframework.web.bind.annotation.RestController;
@RestController
@RequestMapping(value = "/security")
public class SecurityController {
@GetMapping(value = "/hello")
public Response hello() {
UserDetails userDetails = (UserDetails) SecurityContextHolder.getContext().getAuthentication().getPrincipal();
System.out.println(userDetails);
return Response.success("hello");
}
@GetMapping(value = "/anonymous")
public Response anonymous() {
return Response.success("anonymous");
}
@GetMapping(value = "/permitAll")
public Response permitAll() {
return Response.success("permitAll");
}
}
|
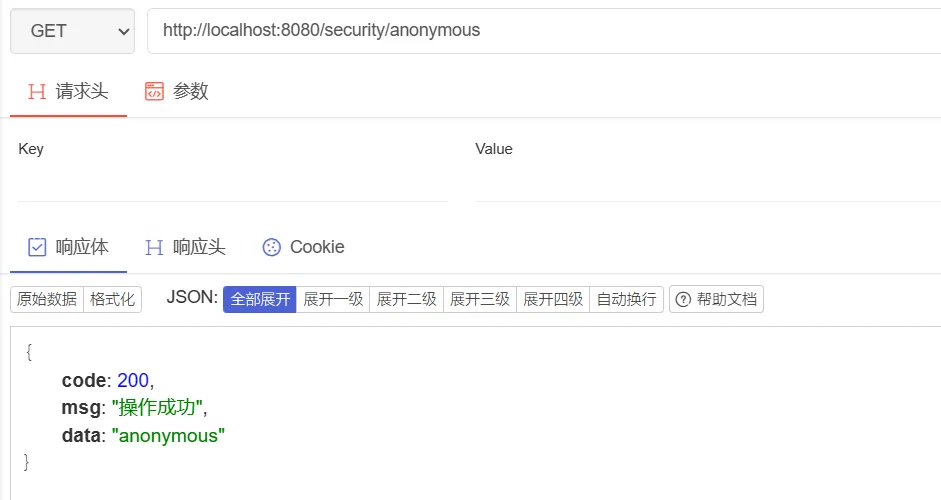
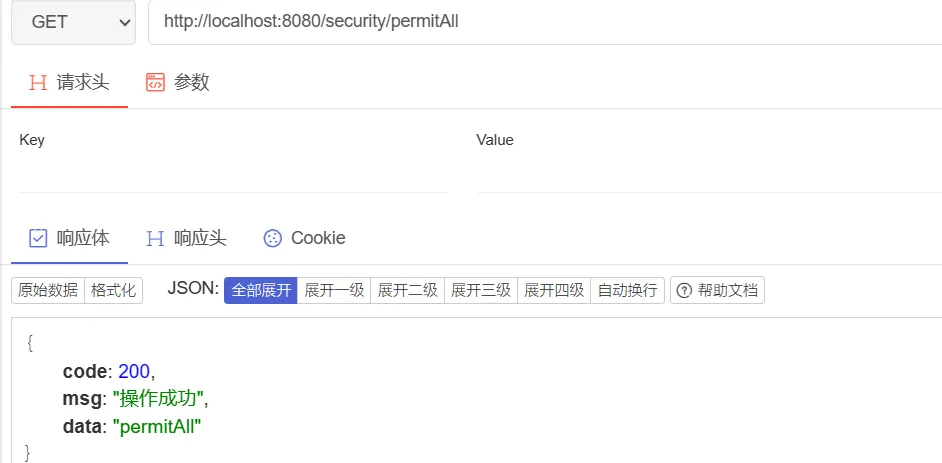
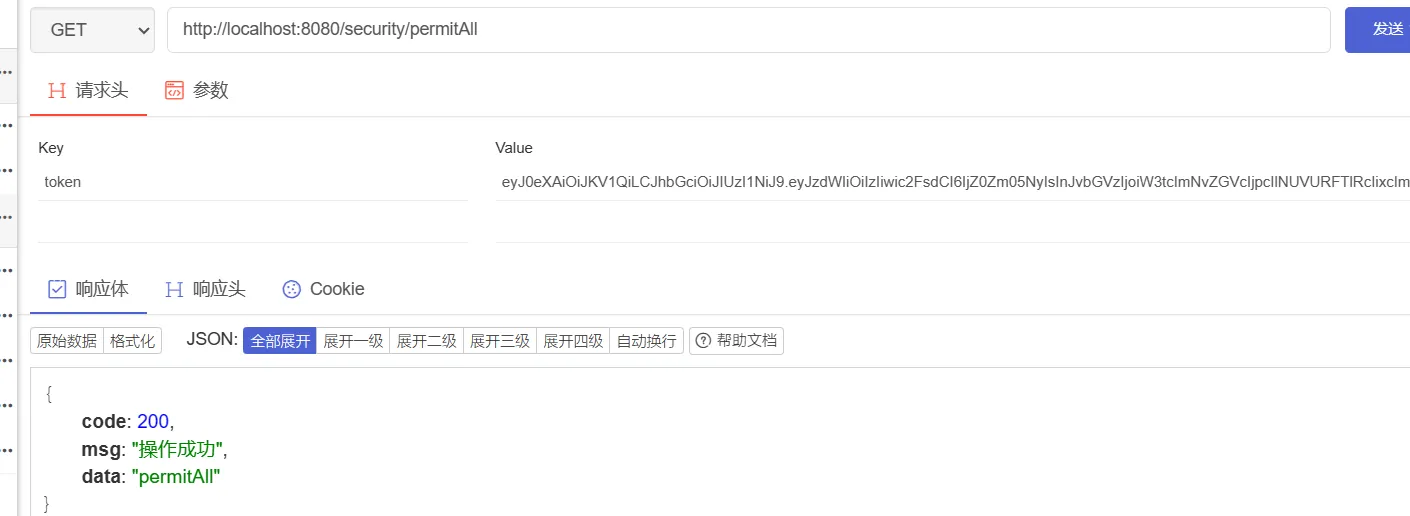
运行项目,进行测试,在未登录的情况下,访问anonymous和permitAll接口:
在登录情况下访问anonymous和permitAll
2.2.2. 权限授权
| 方法 |
说明 |
| hasAuthority(String authorities) |
拥有指定权限的用户可以访问 |
| hasAnyAuthority(String… authorities) |
拥有指定任一权限的用户可访问 |
我们修改SpringSecurity的配置,添加下面的权限信息:
1
2
3
4
| .antMatchers("/security/student")
.hasAuthority("STUDENT")
.antMatchers("/security/studentOrCounselor")
.hasAnyAuthority("STUDENT", "COUNSELOR")
|
然后添加相应的测试接口
1
2
3
4
5
6
7
8
9
| @GetMapping(value = "/student")
public Response student() {
return Response.success("学生可以访问");
}
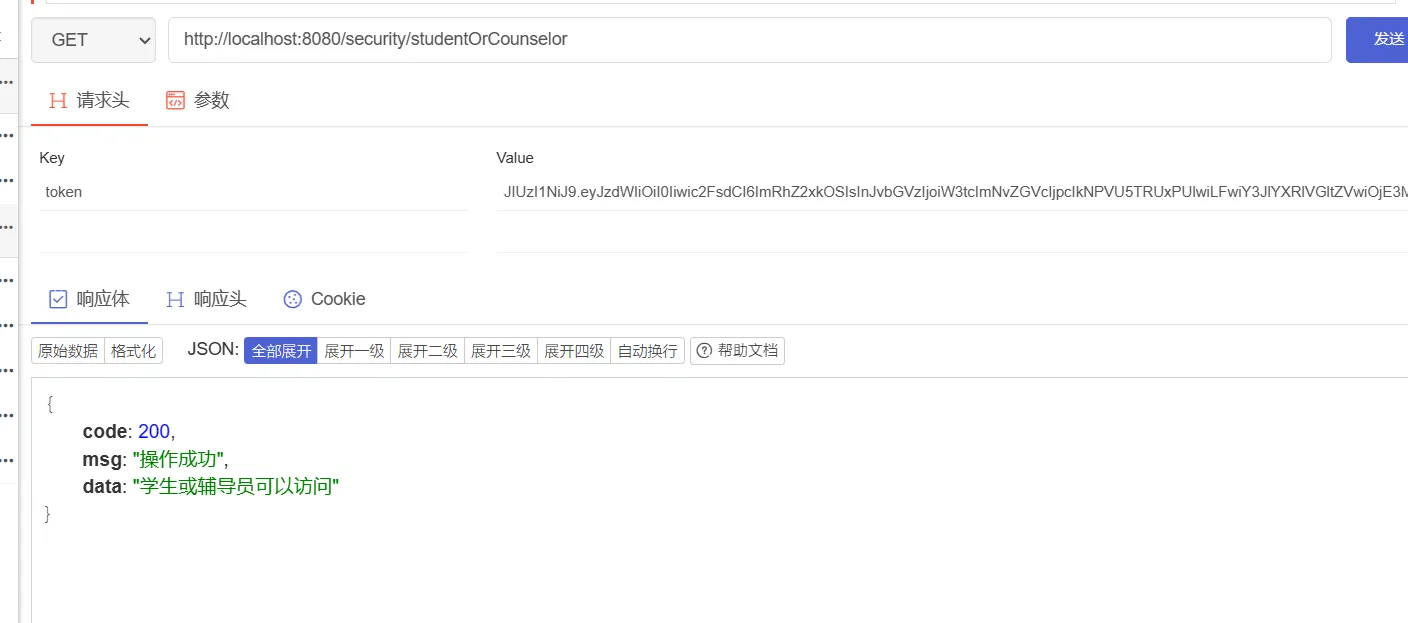
@GetMapping(value = "/studentOrCounselor")
public Response studentOrCounselor() {
return Response.success("学生或辅导员可以访问");
}
|
接着,使用学生账号访问上面两个接口:
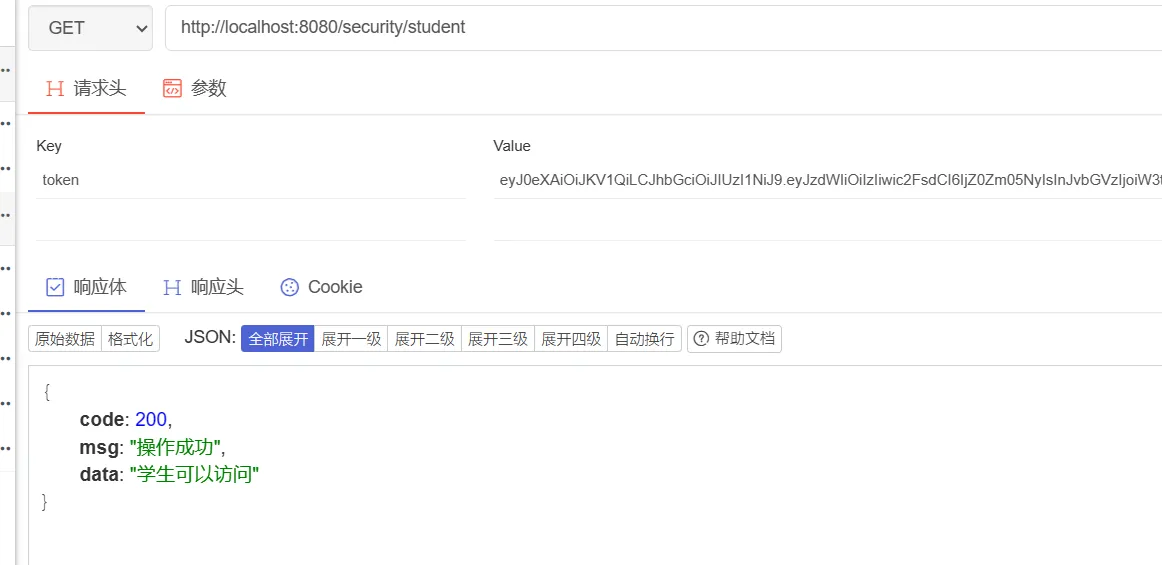
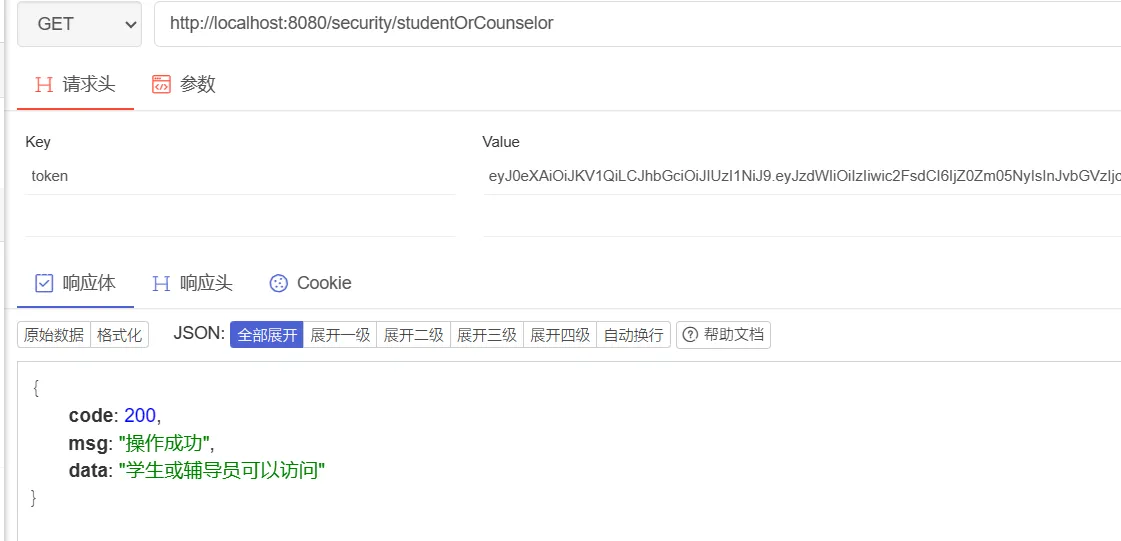
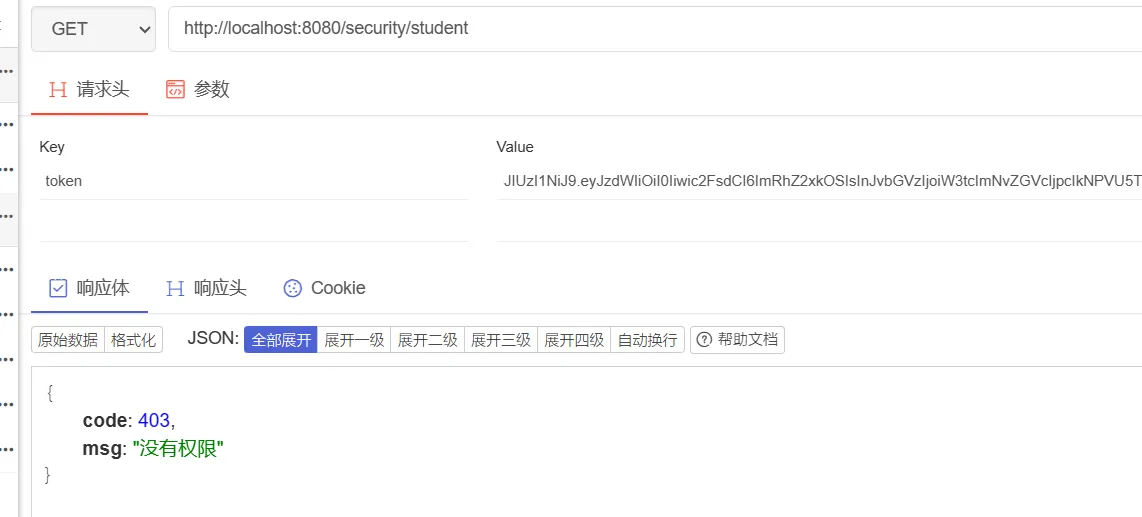
使用辅导员账号访问上面两个接口
2.2.3. 角色授权
| 方法 |
说明 |
| hasRole(String role) |
拥有指定角色的用户可以访问,角色将被增加ROLE_前缀 |
| hasAnyRoles(String… roles) |
拥有指定任一角色的用户可访问 |
这个功能和基于权限认证感觉差不多,只是我们在设置Authority的时候,要加上ROLE_前缀,不然匹配不上,这里就不做演示了。
2.3. 基于注解进行权限校验
在SpringSecurity中,可以通过使用注解的方式进行权限校验,以下是一些常用的SpringSecurity注解:
1)@PreAuthorize和@ PostAuthorize: 用于方法安全性,可以定义方法执行前或执行后的权限校验。前者用于方法执行前,可以根据表达式判断是否有权限执行该方法,后者用于方法执行后,可以检测方法执行的结果是否有权限。
2)@Secured:该注解用于方法或类上,要求用户具有所有的指定角色。
3)@PermitAll:用于方法或类上,表示该方法对所有用户开放,无需权限即可访问。
4)@DenyAll:用于方法或类上,表示该方法对所有用户都不可访问。
5)@Authenticated:用于方法上,表示用户需要被认证(即已经通过身份验证)。
上述这些注解,SpringSecurity会利用表达式进行动态权限校验,其中可以使用hasRole、hasAuthority、hasAnyRole、hasAnyAuthority等方法来判断用户角色或权限。
在方法的权限控制上,SpringSecurity支持三种类型的注解,JSR-250注解,@Secured注解和表达式的注解,这三种注解默认都没有启动,需要通过@EnableGlobalMethodSecurity来启用,这些注解都可以卸载Service接口或方法上,也可以写到Controller或Controller的方法上。
2.3.1. 表达式的注解
我们以PreAuthorize注解为例,首先,要在配置类中开启注解,在配置类上,加上下面这行代码
1
| @EnableGlobalMethodSecurity(prePostEnabled = true)
|
然后,我们添加两个接口,用于测试PreAuthorize注解
1
2
3
4
5
6
7
8
9
10
11
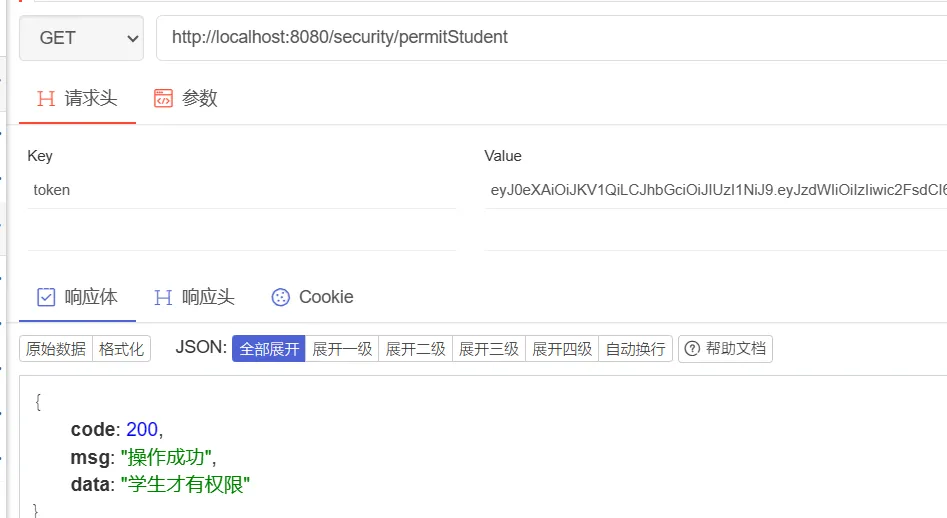
| @PreAuthorize(value = "hasAuthority('STUDENT')")
@GetMapping(value = "/permitStudent")
public Response permitStudent() {
return Response.success("学生才有权限");
}
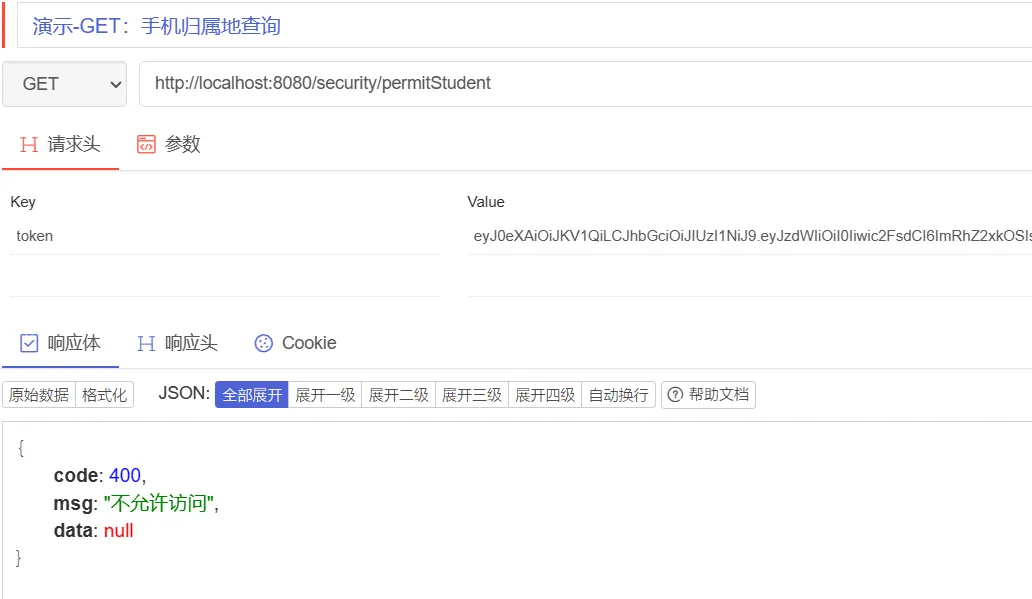
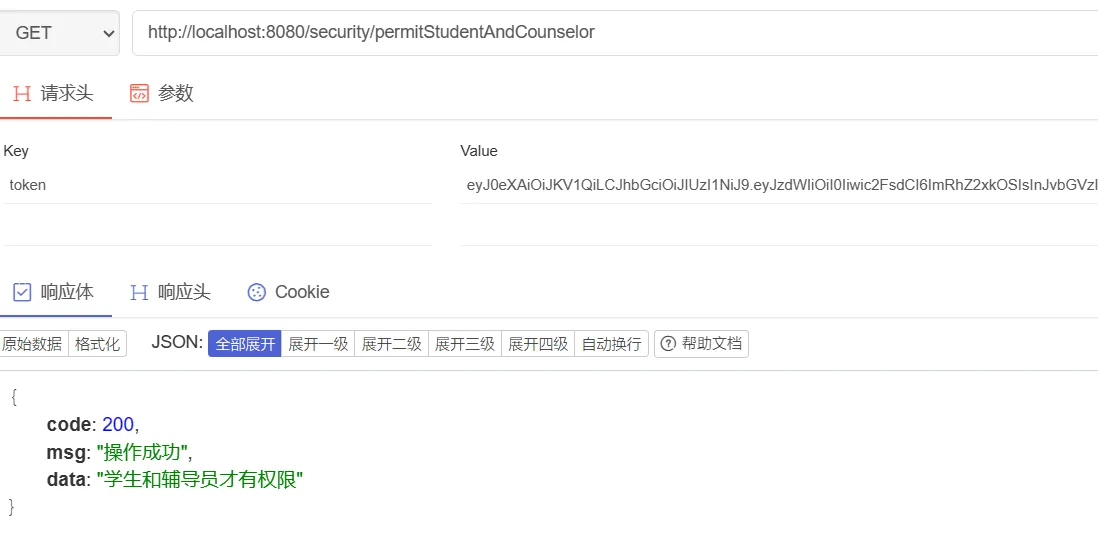
@PreAuthorize(value = "hasAnyAuthority('STUDENT', 'COUNSELOR')")
@GetMapping(value = "/permitStudentAndCounselor")
public Response permitStudentAndCounselor() {
return Response.success("学生和辅导员才有权限");
}
|
使用学生账号,访问上面两个接口:

使用辅导员账号访问上面两个接口:
2.3.2. JSR-250注解
首先,修改SpringSecurity配置类,在刚才的基础上,开启jsr-250注解
1
| @EnableGlobalMethodSecurity(prePostEnabled = true, jsr250Enabled = true)
|
然后添加一个接口,用于测试
1
2
3
4
5
| @PermitAll
@GetMapping(value = "/jsr250PermitAll")
public Response jsr250PermitAll() {
return Response.success("jsr250PermitAll");
}
|
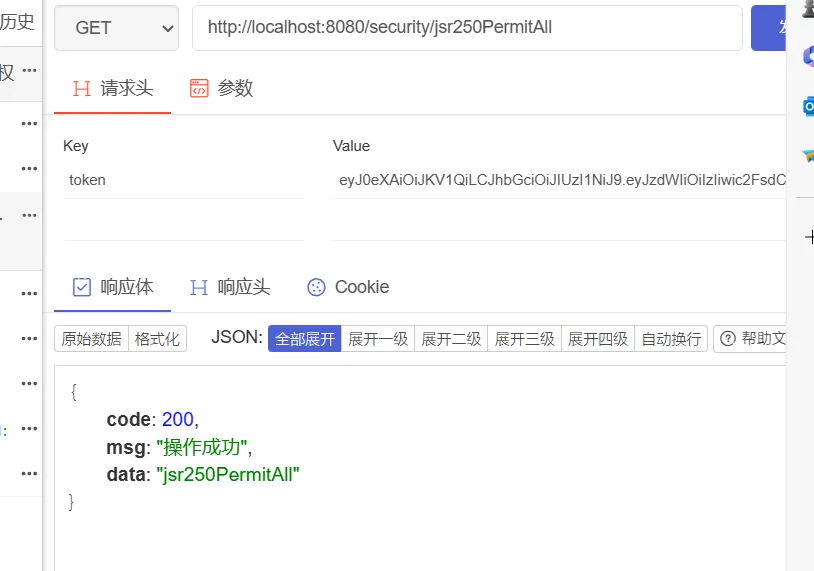
首先,分别使用不同权限的用户登录token,访问该接口,结果如下:
然后,不携带token访问该接口(未登录状态下访问接口):
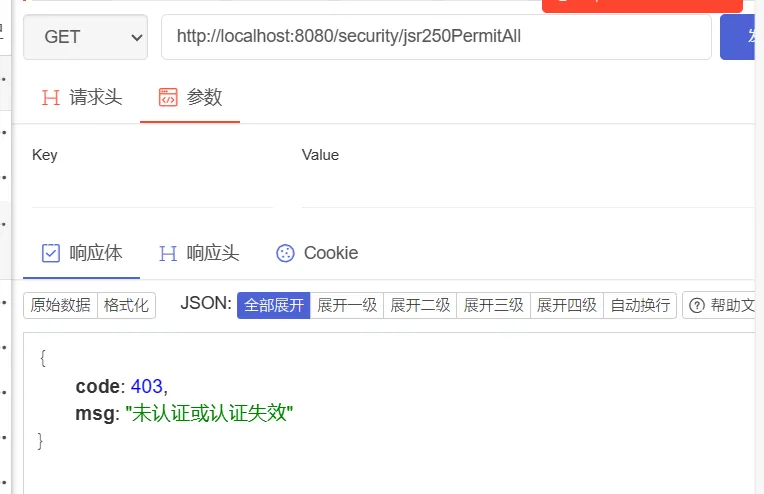
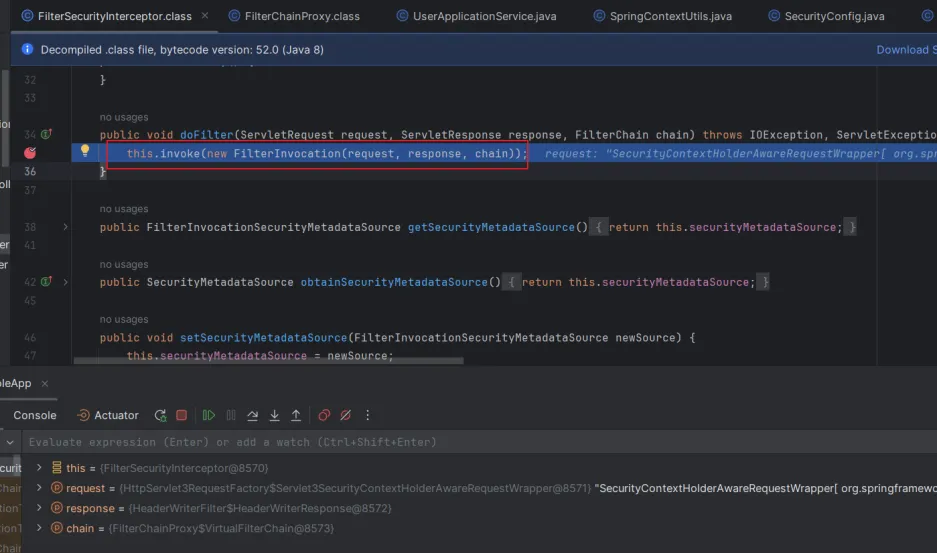
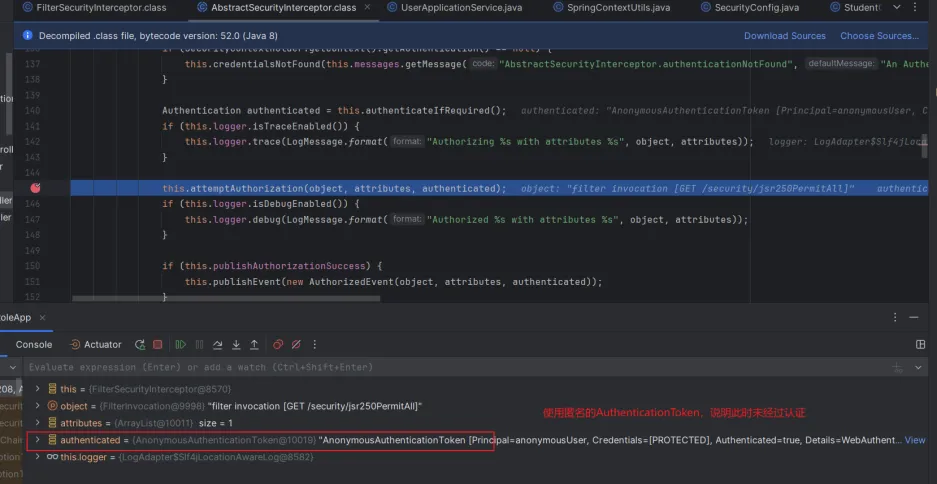
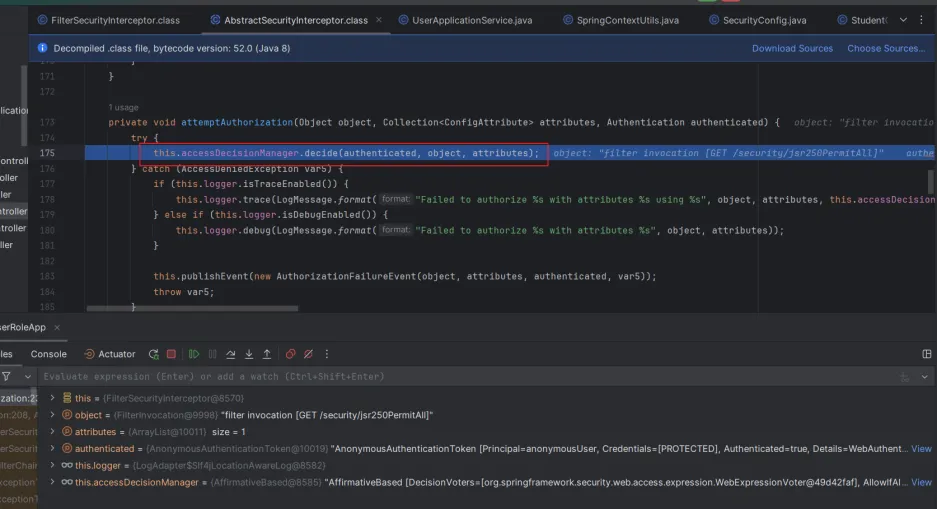
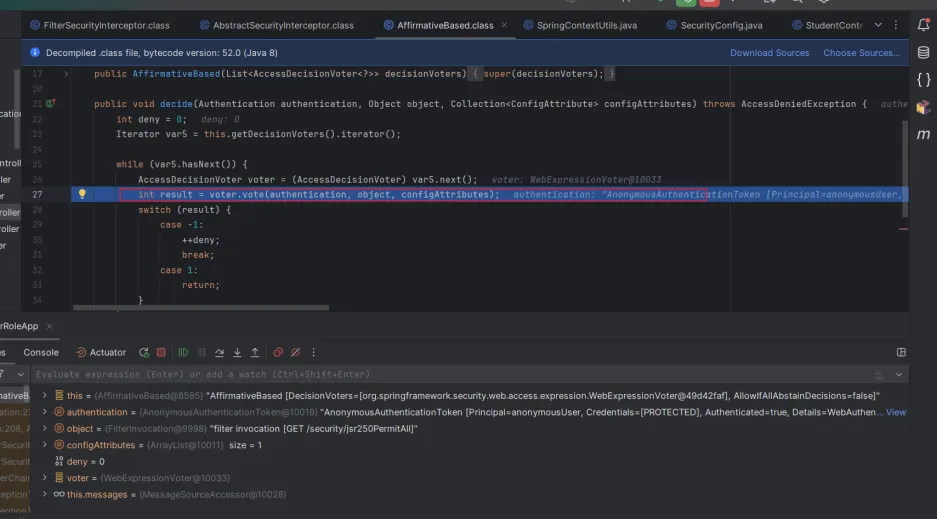
这里会被拦截,原因是会先经过FilterSecurityInterceptor过滤器,利用匿名的认证用户进行投票决策,此时vote返回-1(因为没有匹配到当前url,只能匹配authenticated),默认AffirmativeBased决策下就会直接抛出AccessDeniedException,因此就不会今日到MethodSecurityInterceptor的判断逻辑,必须认证之后才行。debug过程如下:
首先会浸入FilterSecurityInterceptor过滤器:
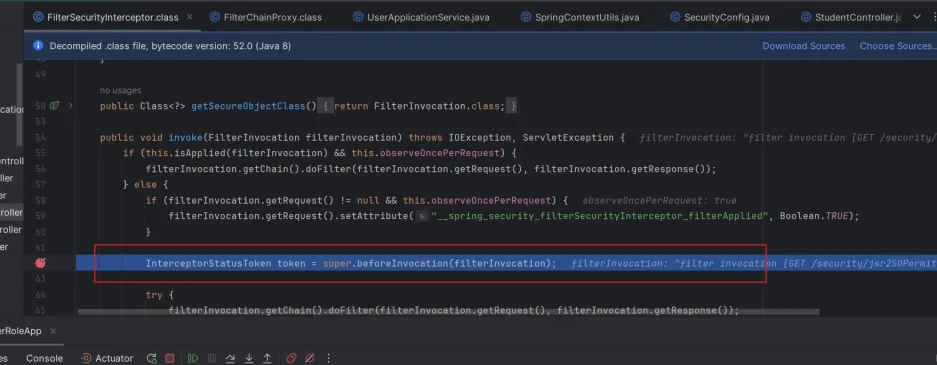
此时使用的是匿名的认证用户,进行投票决策
因为没有匹配到当前url,智能匹配authenticated,因此vote返回-1
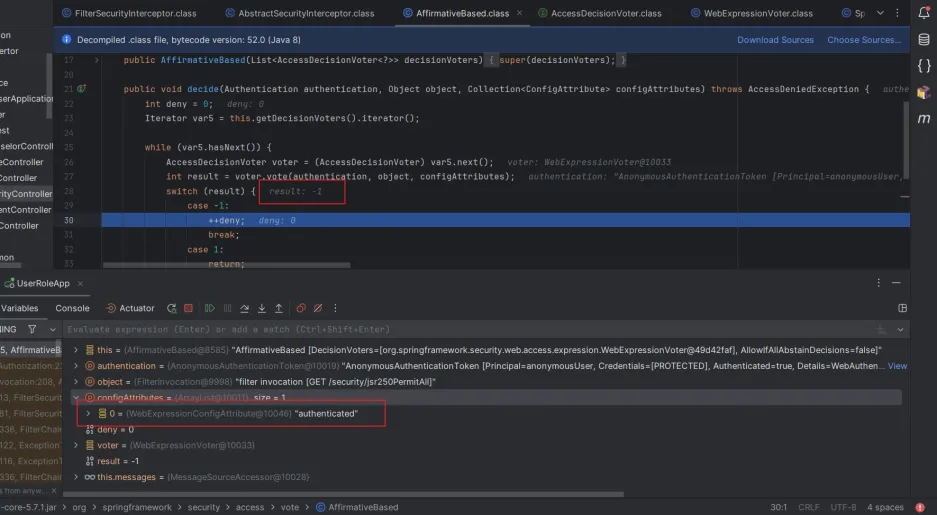
最后,抛出AccessDeniedException异常

2.3.3. Secured注解
首先,修改SpringSecurity的配置类,开启Secured注解的支持。
1
| @EnableGlobalMethodSecurity(prePostEnabled = true, jsr250Enabled = true, securedEnabled = true)
|
Secured是专门用来判断是否具有角色的,参数要以ROLE开头,不过我们之前设置的权限,如STUDENT、COUNSELOR都没有以ROLE开头,我们先修改一些MyUserDetails类的richAuthority,加上ROLE前缀。
1
2
3
4
5
6
7
8
9
| private void richAuthority() {
List<PermissionDetails> permissionDetails = userContextDetails.getPermissionDetails();
if (CollectionUtils.isEmpty(permissionDetails)) {
return;
}
String[] permissions = permissionDetails.stream().map(permission -> "ROLE_" + permission.getName())
.collect(Collectors.toList()).toArray(new String[0]);
this.authorityList = AuthorityUtils.createAuthorityList(permissions);
}
|
然后添加测试方法:
1
2
3
4
5
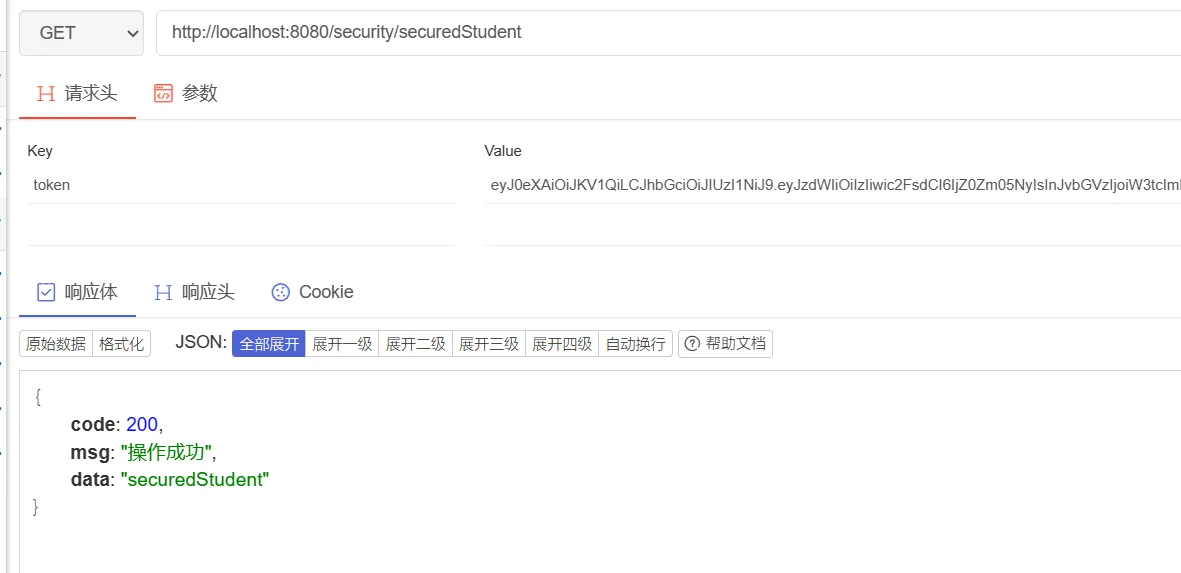
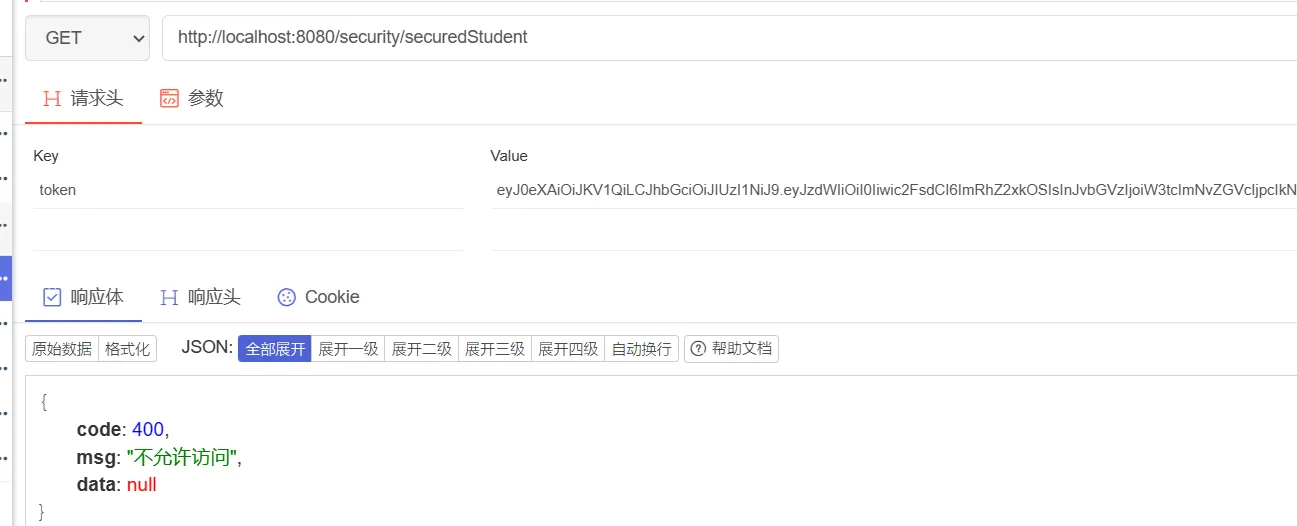
| @Secured(value = "ROLE_STUDENT")
@GetMapping(value = "/securedStudent")
public Response securedStudent() {
return Response.success("securedStudent");
}
|
分别用学生账号和辅导员账号访问该接口,结果如下:
3. 参考文章
https://blog.csdn.net/weixin_46073538/article/details/128641746
https://blog.csdn.net/qq_41071876/article/details/122086856