SpringBoot执行定时任务
对于定时任务的执行,SpringBoot提供了三种创建方式:
1)基于注解(@Scheduled)
2)基于接口(SchedulingConfigurer)
3)基于注解设定多线程定时任务
基于Scheduled注解
首先我们创建一个SpringBoot项目,然后引入spring-boot-starter-web依赖,在启动类上添加EnableScheduling注解开启定时任务管理。
1
2
3
4
5
6
7
8
9
10
11
12
13
14
| package com.yang.demo1;
import org.springframework.boot.SpringApplication;
import org.springframework.boot.autoconfigure.SpringBootApplication;
import org.springframework.scheduling.annotation.EnableScheduling;
@SpringBootApplication
@EnableScheduling
public class ScheduledDemoApplication {
public static void main(String[] args) {
SpringApplication.run(ScheduledDemoApplication.class, args);
}
}
|
然后我们创建一个定时任务,并使用Scheduled注解
1
2
3
4
5
6
7
8
9
10
11
12
13
14
15
16
17
| package com.yang.demo1;
import org.springframework.scheduling.annotation.Scheduled;
import org.springframework.stereotype.Component;
import java.text.SimpleDateFormat;
import java.util.Date;
@Component
public class DemoTask {
@Scheduled(cron = "0/5 * * * * ?")
public void execute() {
SimpleDateFormat df = new SimpleDateFormat("yyyy-MM-dd HH:mm:ss");
System.out.println("hello world: " + df.format(new Date()));
}
}
|
启动项目,执行结果如下所示,每隔5秒,便会执行一次定时任务。

Scheduled注解类的源码如下:
1
2
3
4
5
6
7
8
9
10
11
12
13
14
15
16
17
18
19
20
21
22
23
24
25
26
27
28
29
30
31
32
| package org.springframework.scheduling.annotation;
import java.lang.annotation.Documented;
import java.lang.annotation.ElementType;
import java.lang.annotation.Repeatable;
import java.lang.annotation.Retention;
import java.lang.annotation.RetentionPolicy;
import java.lang.annotation.Target;
@Target({ElementType.METHOD, ElementType.ANNOTATION_TYPE})
@Retention(RetentionPolicy.RUNTIME)
@Documented
@Repeatable(Schedules.class)
public @interface Scheduled {
String CRON_DISABLED = "-";
String cron() default "";
String zone() default "";
long fixedDelay() default -1L;
String fixedDelayString() default "";
long fixedRate() default -1L;
String fixedRateString() default "";
long initialDelay() default -1L;
String initialDelayString() default "";
}
|
除了刚才代码中使用到的cron参数,我们还可以使用fixedDelay和fixedRate等参数。fixedDelay和fixedRate很相似,但又略有不同,其中fixedDelay表示在某次任务执行完毕后,间隔fixedDelay的时间再执行,而fixedRate表示在某次任务执行开始后,间隔fixedRate的时间再执行。
我们对这两个参数,添加对应的测试方法:
1
2
3
4
5
6
7
8
9
10
11
12
13
14
15
16
17
18
19
20
21
| @Scheduled(fixedDelay = 5000)
public void executeFixedDelay() {
SimpleDateFormat df = new SimpleDateFormat("yyyy-MM-dd HH:mm:ss");
System.out.println("executeFixedDelay开始执行了==========" + df.format(new Date()));
try {
Thread.sleep(2000);
} catch (InterruptedException e) {
e.printStackTrace();
}
}
@Scheduled(fixedRate = 5000)
public void executeFixedRate() {
SimpleDateFormat df = new SimpleDateFormat("yyyy-MM-dd HH:mm:ss");
System.out.println("executeFixedRate开始执行了==========" + df.format(new Date()));
try {
Thread.sleep(2000);
} catch (InterruptedException e) {
e.printStackTrace();
}
}
|
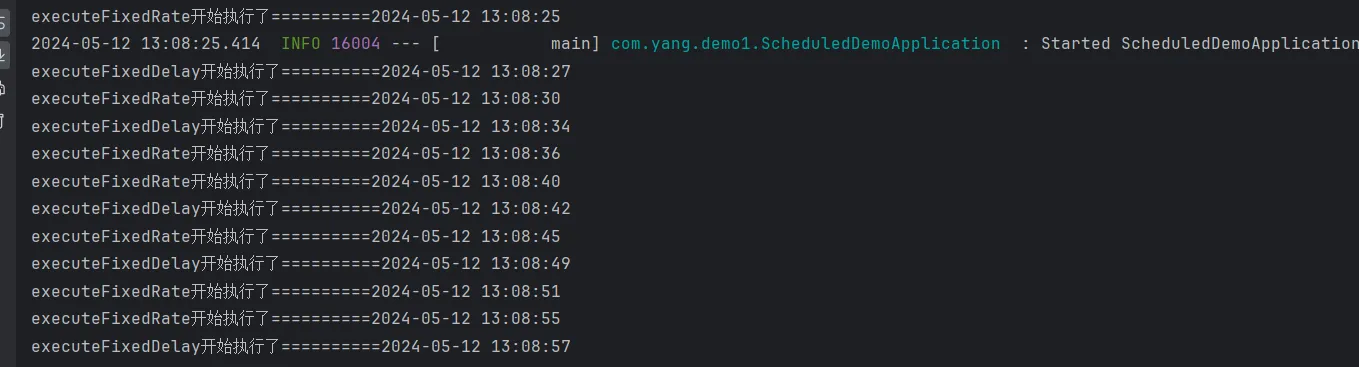
启动项目,执行结果如下。我们可以看到,executeFixedDelay在任务执行完毕后,间隔5秒才执行下一个任务,也就是说,两个任务之间间隔7秒,而executeFixedRate在任务执行开始后,间隔5秒执行下一个任务,也就是两个任务之间间隔5秒。综上所示,fixedDelay和fixedRate之间的区别,其实就在于计算两个任务执行间隔时,需不需要考虑任务的执行时长。
首先我们在数据库中创建t_cron表,并添加数据:
1
2
3
4
5
6
7
| DROP TABLE IF EXISTS t_cron;
CREATE TABLE t_cron (
cron_id VARCHAR(30) NOT NULL PRIMARY KEY,
cron VARCHAR(30) NOT NULL
);
INSERT INTO t_cron VALUES ('1', '0/5 * * * * ?');
|
然后修改pom.xml,加上数据库的相关依赖:
1
2
3
4
5
6
7
8
9
| <dependency>
<groupId>mysql</groupId>
<artifactId>mysql-connector-java</artifactId>
</dependency>
<dependency>
<groupId>com.baomidou</groupId>
<artifactId>mybatis-plus-boot-starter</artifactId>
<version>3.4.3</version>
</dependency>
|
修改配置文件:
1
2
3
4
5
6
7
8
9
| spring:
datasource:
username: root
password: 3fa4d180
url: jdbc:mysql://localhost:3306/test01?useSSL=false&serverTimezone=UTC
driver-class-name: com.mysql.cj.jdbc.Driver
mybatis-plus:
configuration:
log-impl: org.apache.ibatis.logging.stdout.StdOutImpl
|
创建对应的mapper:
1
2
3
4
5
6
7
8
9
10
11
| package com.yang.demo1.mapper;
import org.apache.ibatis.annotations.Mapper;
import org.apache.ibatis.annotations.Select;
@Mapper
public interface CronMapper {
@Select("select cron from t_cron limit 1")
String getCron();
}
|
然后,我们编写定时任务,通过读取我们在数据库设置好的执行周期,来执行定时任务,代码如下:
1
2
3
4
5
6
7
8
9
10
11
12
13
14
15
16
17
18
19
20
21
22
23
24
25
26
27
28
29
30
31
32
33
34
35
36
37
| package com.yang.demo1;
import com.yang.demo1.mapper.CronMapper;
import org.springframework.beans.factory.annotation.Autowired;
import org.springframework.context.annotation.Configuration;
import org.springframework.scheduling.annotation.EnableScheduling;
import org.springframework.scheduling.annotation.SchedulingConfigurer;
import org.springframework.scheduling.config.ScheduledTaskRegistrar;
import org.springframework.scheduling.support.CronTrigger;
import java.time.LocalDateTime;
@Configuration
@EnableScheduling
public class DynamicScheduleConfigurer implements SchedulingConfigurer {
@Autowired
private CronMapper cronMapper;
@Override
public void configureTasks(ScheduledTaskRegistrar taskRegistrar) {
taskRegistrar.addTriggerTask(
() -> execute(),
triggerContext -> {
String cron = cronMapper.getCron();
if (StringUtils.isEmpty(cron)) {
throw new RuntimeException("cron 格式有误");
}
return new CronTrigger(cron).nextExecutionTime(triggerContext);
}
);
}
private void execute() {
System.out.println("hello world:" + new Date());
}
}
|
执行结果如下所示,一开始的cron是每5秒执行一次,后来我们修改cron,改为10秒执行一次,此时任务的执行频率,也随之我们数据库的修改动态地进行了调整。

EnableAsync注解
对于Scheduled,默认为单线程,当开启多个任务时,任务地执行实际会受到上一个任务执行时间地影响,所以需要使用Async注解,通过该注解开启多线程使任务之间不会相互影响。
ScheduledExecutorService执行定时任务
SpringBoot执行定时任务很简单,但是如果我们不使用SpringBoot,又该如何启动定时任务?这个时候,我们就可以使用ScheduledExecutorService接口,这个接口用于在一些预定义的延迟之后运行任务或定期运行任务。我们可以通过Executors类的工厂方法实例化ScheduledExecutorService,如下:
1
| ScheduledExecutorService scheduledExecutorService = Executors.newSingleThreadScheduledExecutor()
|
在ScheduledExecutorService接口中,有三个主要方法:
1)schedule:允许在指定的延迟后执行一次任务。
2)scheduleAtFixedRate:允许在指定的初始延迟后执行任务,然后以一定的周期重复执行,其中period参数用于指定两个任务的开始时间之间的间隔时间,因此任务执行的频率是固定的。
3)scheduleWithFixedDelay:类似于scheduleAtFixedRate,它也重复执行给定的任务,单period参数用于指定前一个任务的结束和下一个任务的开始之间的间隔时间,也就是指定下一个任务延时多久后才执行,执行频率可能会有所不同,具体取决于执行任务给定任务所需的时间。
schedule方法
1
2
3
4
5
6
7
8
9
10
11
12
13
14
15
16
17
18
19
20
21
22
23
24
25
26
27
28
29
30
| package com.yang.demo2;
import java.util.Date;
import java.util.concurrent.Executors;
import java.util.concurrent.ScheduledExecutorService;
import java.util.concurrent.TimeUnit;
public class ScheduledExecutorServiceMain {
public static void main(String[] args) {
ScheduledExecutorService scheduledExecutorService = Executors.newScheduledThreadPool(1);
scheduledExecutorService.schedule(() -> {
System.out.println("Hello World:" + new Date());
}, 1, TimeUnit.SECONDS);
try {
Thread.sleep(20000);
} catch (InterruptedException e) {
throw new RuntimeException(e);
}
scheduledExecutorService.shutdown();
try {
if (!scheduledExecutorService.awaitTermination(10, TimeUnit.SECONDS)) {
scheduledExecutorService.shutdownNow();
}
} catch (InterruptedException e) {
e.printStackTrace();
}
}
}
|
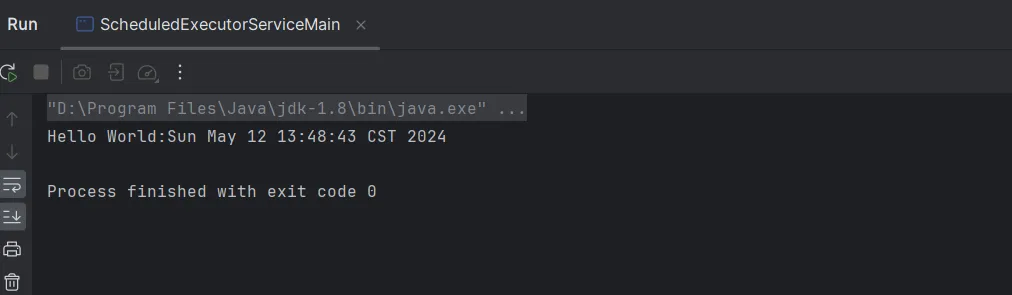
结果如下:在延迟一秒后,开始执行任务,且只执行一次。
scheduleAtFixRate
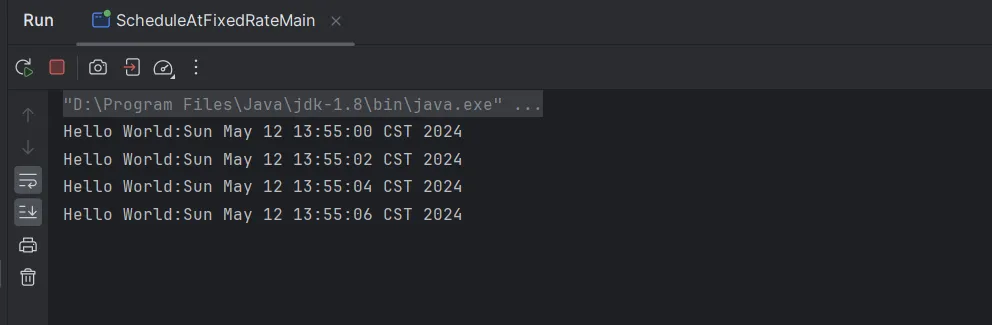
当我们需要在固定延迟后,定期执行任务时,可以使用scheduleAtFixedRate方法,如下所示,每隔2秒执行相同的任务
1
2
3
4
5
6
7
8
9
10
11
12
13
14
15
16
17
18
19
20
21
22
23
24
25
| public static void main(String[] args) {
ScheduledExecutorService scheduledExecutorService = Executors.newScheduledThreadPool(1);
scheduledExecutorService.scheduleAtFixedRate(() -> {
System.out.println("Hello World:" + new Date());
try {
Thread.sleep(1000);
} catch (InterruptedException e) {
e.printStackTrace();
}
}, 0, 2, TimeUnit.SECONDS);
try {
Thread.sleep(20000);
} catch (InterruptedException e) {
throw new RuntimeException(e);
}
scheduledExecutorService.shutdown();
try {
if (!scheduledExecutorService.awaitTermination(10, TimeUnit.SECONDS)) {
scheduledExecutorService.shutdownNow();
}
} catch (InterruptedException e) {
e.printStackTrace();
}
}
|
结果如下:
如果任务执行时间比间隔时间长,那么scheduledExecutorService将等待当前任务执行完毕后再开始执行下一个任务,我们修改代码如下:
1
2
3
4
5
6
7
8
9
10
11
12
13
14
15
16
17
18
19
20
21
22
23
| ScheduledExecutorService scheduledExecutorService = Executors.newScheduledThreadPool(4);
scheduledExecutorService.scheduleAtFixedRate(() -> {
System.out.println("Hello World:" + new Date());
try {
Thread.sleep(3000);
} catch (InterruptedException e) {
e.printStackTrace();
}
}, 0, 2, TimeUnit.SECONDS);
try {
Thread.sleep(20000);
} catch (InterruptedException e) {
throw new RuntimeException(e);
}
scheduledExecutorService.shutdown();
try {
if (!scheduledExecutorService.awaitTermination(10, TimeUnit.SECONDS)) {
scheduledExecutorService.shutdownNow();
}
} catch (InterruptedException e) {
e.printStackTrace();
}
|
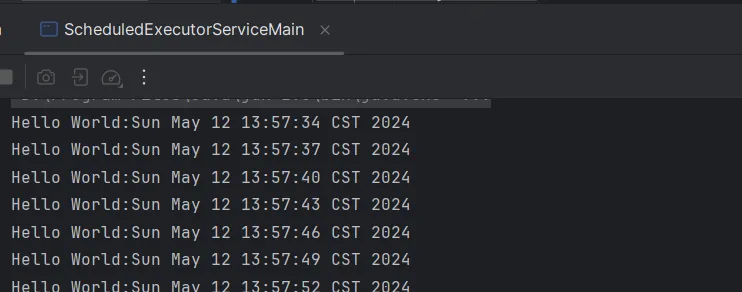
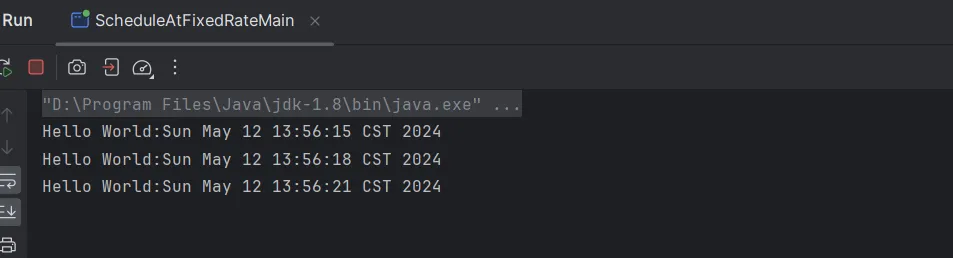
结果如下,每隔3秒执行一次任务
scheduleWithFixedDelay方法
如果任务之间必须具有固定长度的延迟,那么可以使用scheduleWithFixedDelay方法。
1
2
3
4
5
6
7
8
9
10
11
12
13
14
15
16
17
18
19
20
21
22
23
24
25
| public static void main(String[] args) {
ScheduledExecutorService scheduledExecutorService = Executors.newScheduledThreadPool(4);
scheduledExecutorService.scheduleWithFixedDelay(() -> {
System.out.println("Hello World:" + new Date());
try {
Thread.sleep(1000);
} catch (InterruptedException e) {
e.printStackTrace();
}
}, 0, 2, TimeUnit.SECONDS);
try {
Thread.sleep(20000);
} catch (InterruptedException e) {
throw new RuntimeException(e);
}
scheduledExecutorService.shutdown();
try {
if (!scheduledExecutorService.awaitTermination(10, TimeUnit.SECONDS)) {
scheduledExecutorService.shutdownNow();
}
} catch (InterruptedException e) {
e.printStackTrace();
}
}
|
在上述代码中,任务执行时长需要1秒,然后设置的间隔时间为2秒,因此,我们可以看到,每隔任务之间,间隔3秒执行一次